for >> Beats > solo HD < wired on-ear headphone ear pad replacements
イヤーパッドBeats by Dr. Dre Solo HD 対応
ヘッドホンイヤーパッドの交換体験記
For your information only. No liability or guarantee this procedure will also work for you. It’s simply MY story how it worked for me – and therefore you may find it helpful.
Ear pads seem to be the most common part prone to wear and tear. イヤーパッドの部分が一番先に壊れてしまいますね。
The solution:解決策
Replacement pads are available. 交換用パーツが販売されています。
Before you start:交換前に
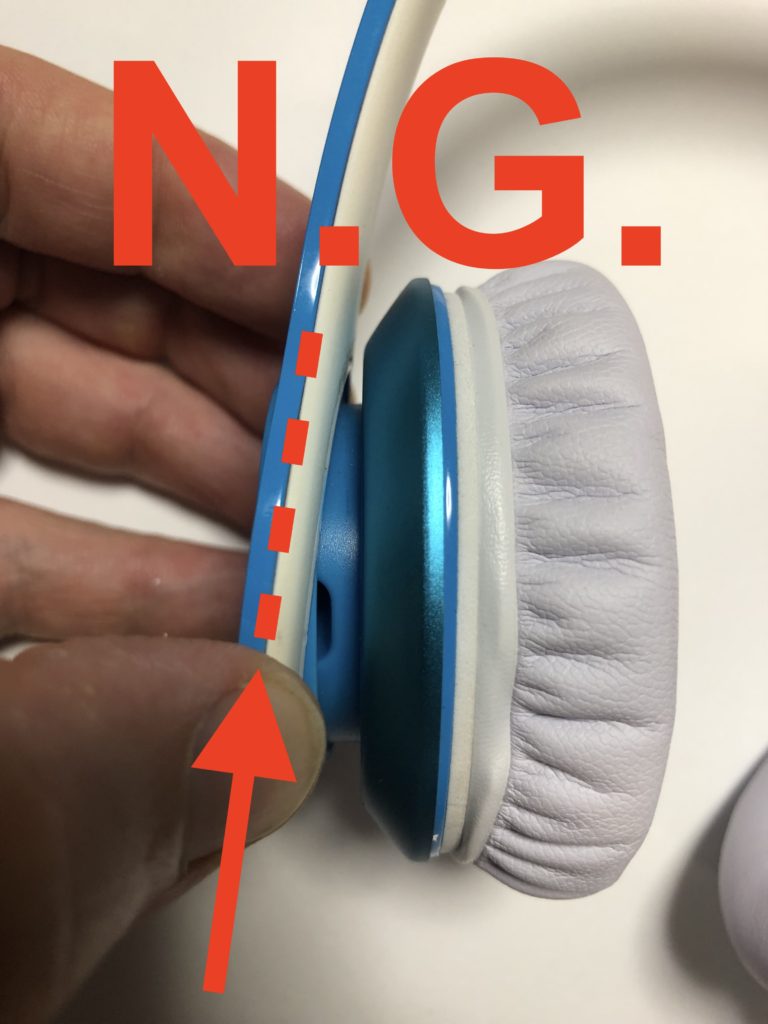
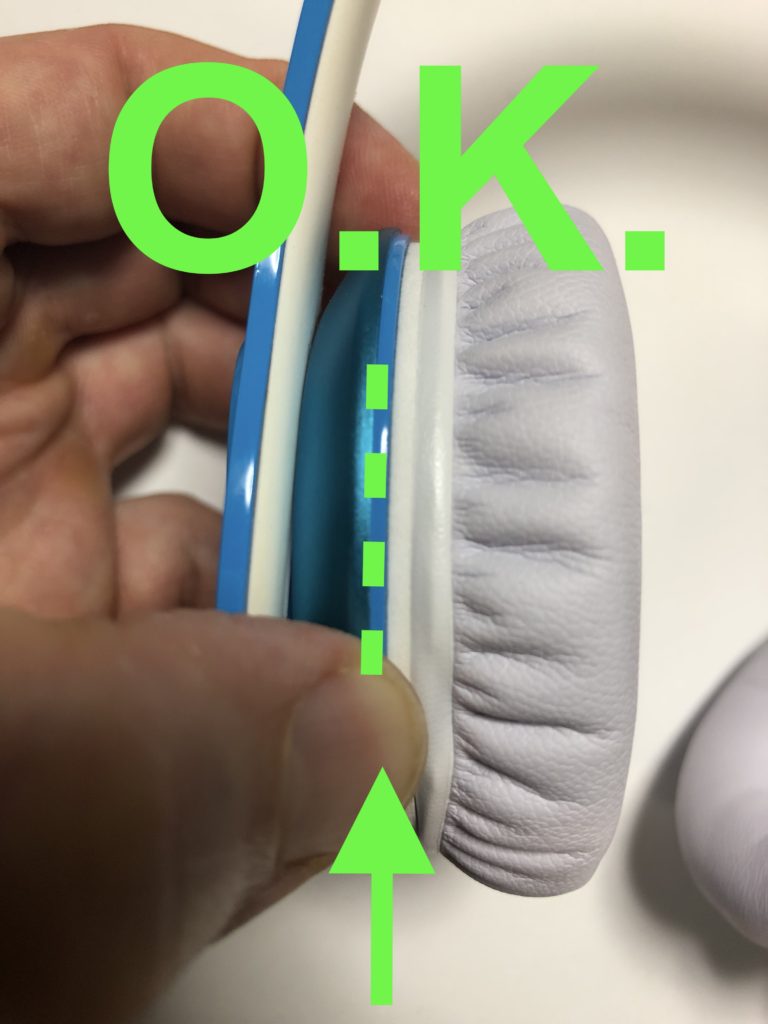
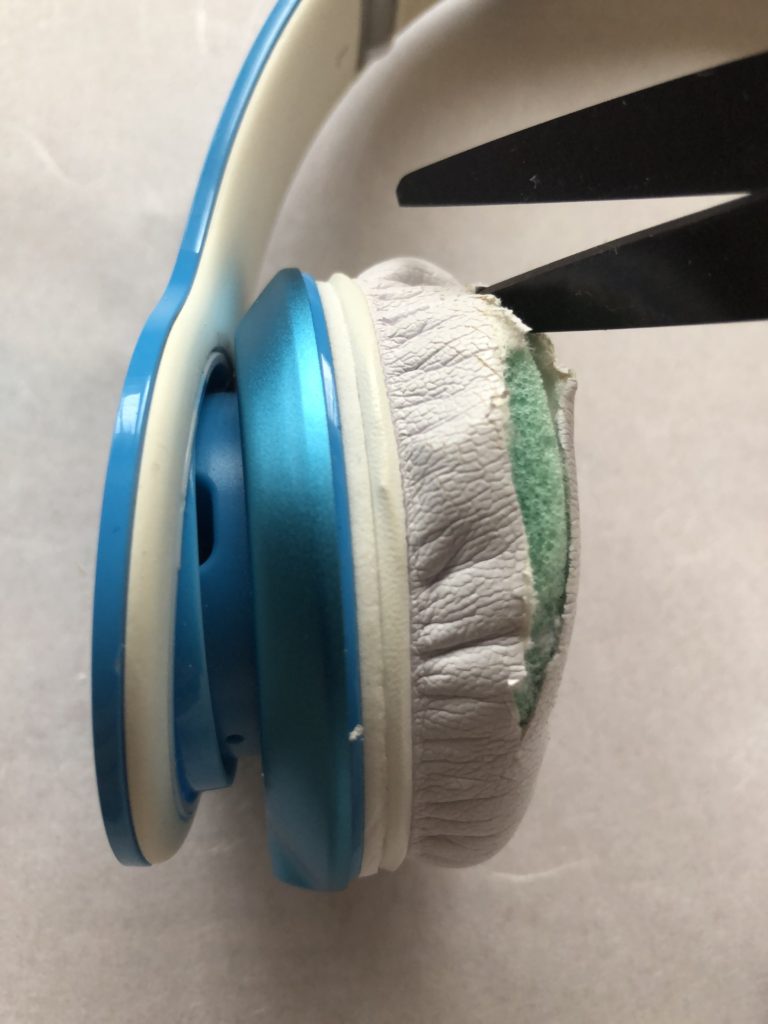
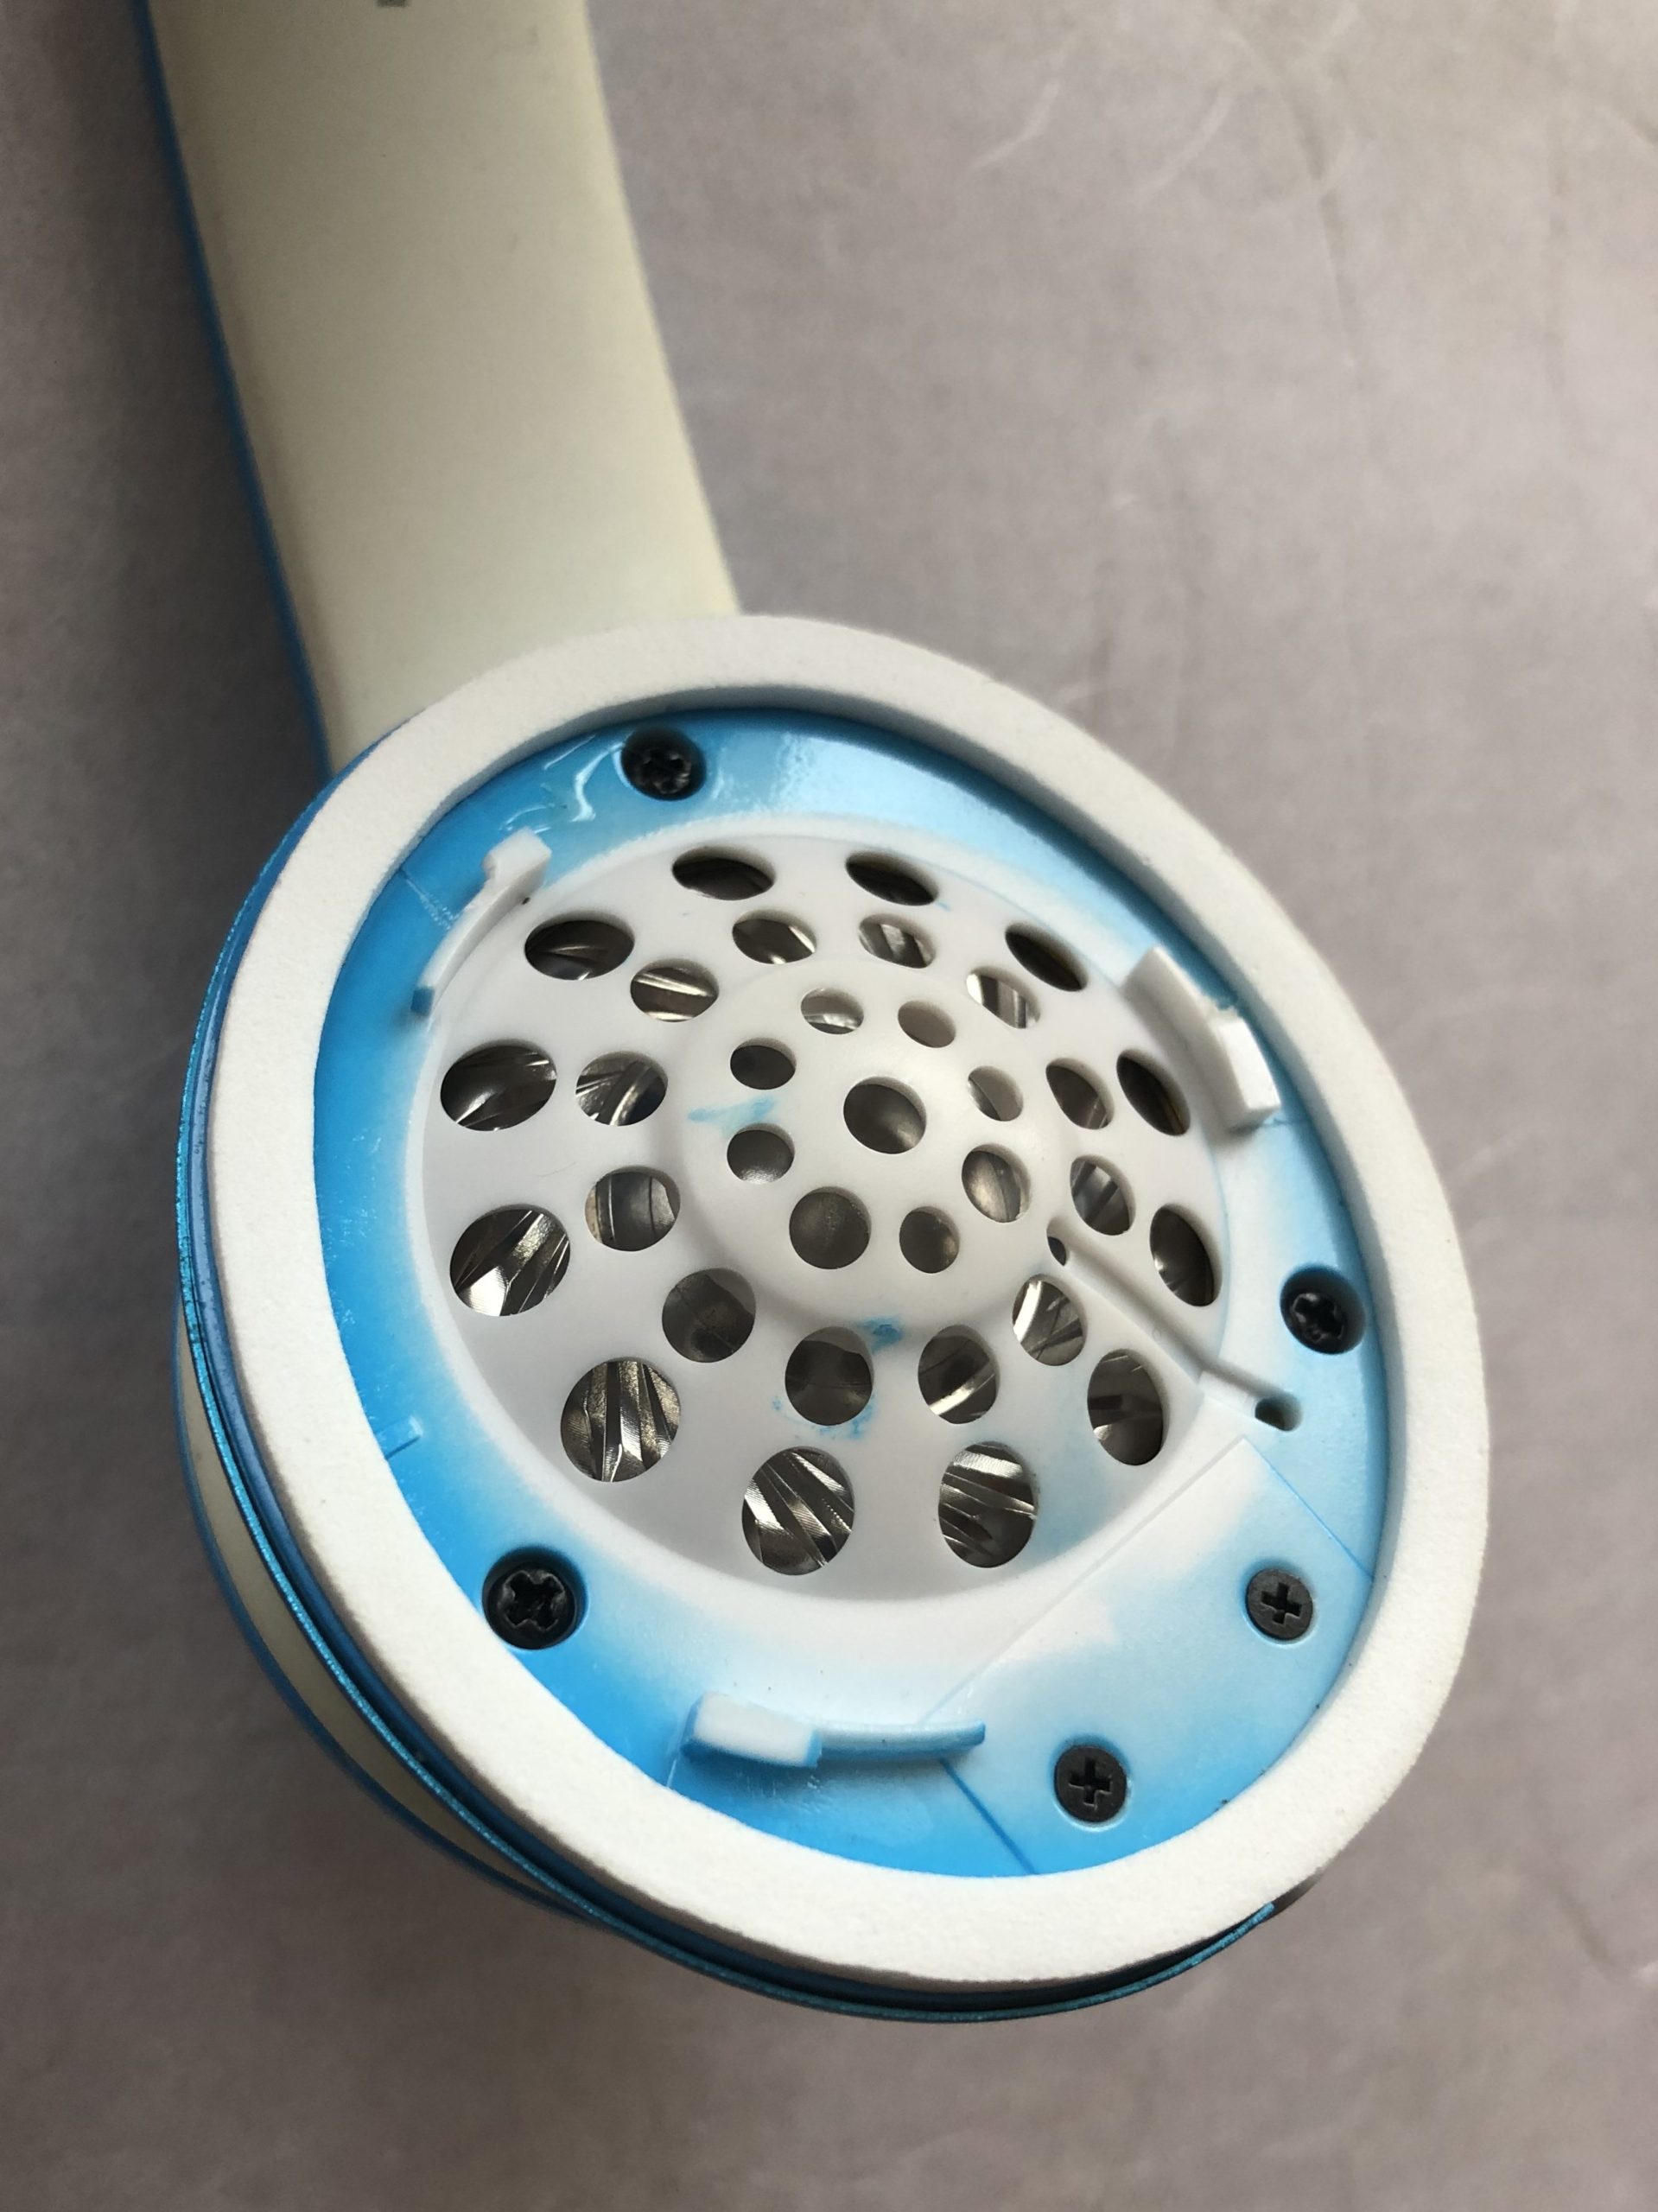
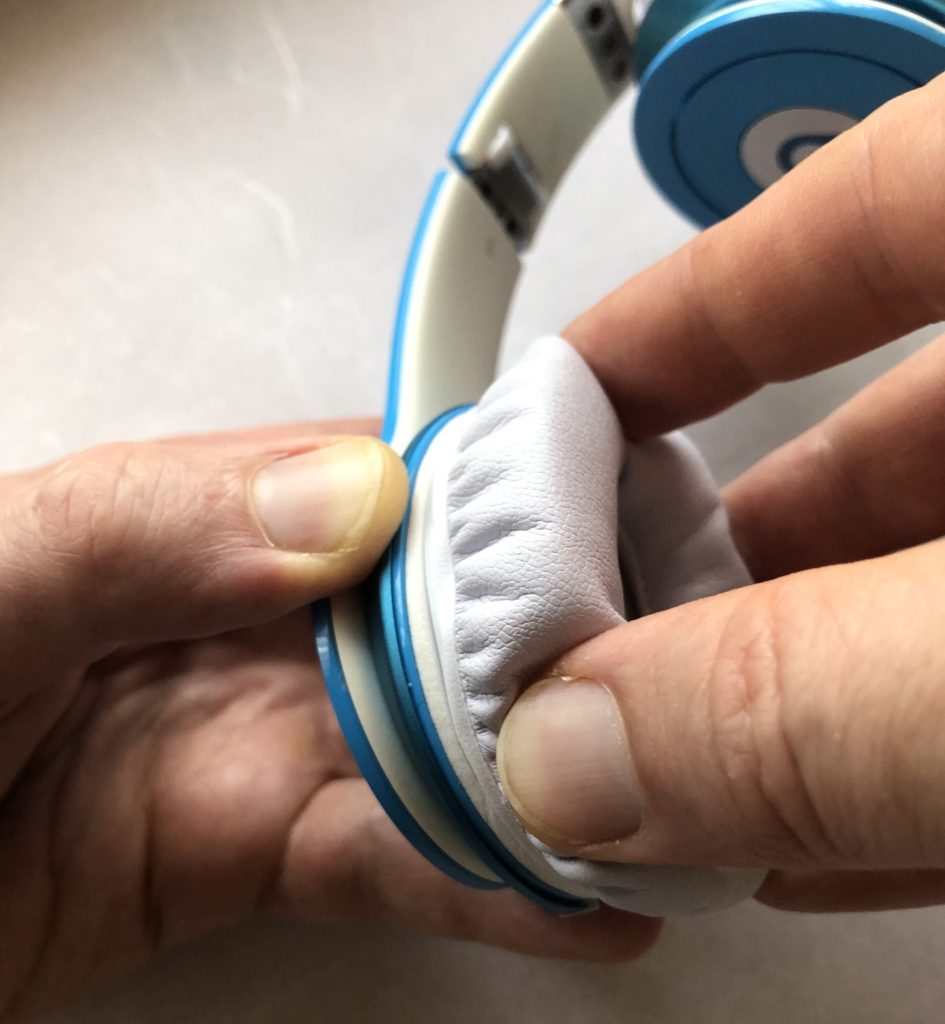
Don’t hold at the headband part. This may lead to break the flexible joints to the speaker (and even cut the electrical cord inside). 上の写真のように、ヘッドバンドの部分を持たないでください。イヤーパッドを取り付けるスピーカー部分のbと書いてある丸い部分(可動性のあるところ)が壊れる原因となります(内側にある電線も壊れてしまいます)。
Hold firmly the speaker just below the attached foam ring. 上の写真のように、ブルーのスピーカーの部分を持ちましょう。
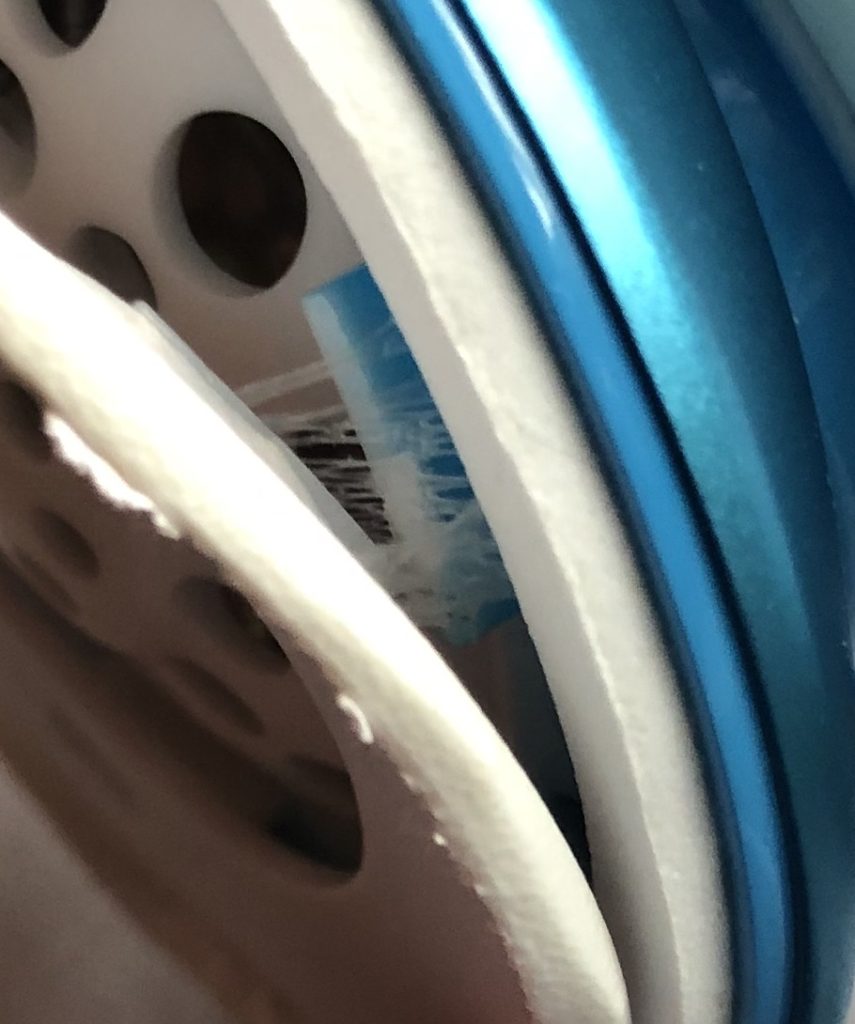
Even though the solo HD ear pads have a screw-and-click like mechanism to attach the pad, the manufacturer used a glue in addition.
イヤーパッド装着部は、回してはめ込むようになっていますが、製造過程でボンドが使われています。
If you try pulling until the glue lets go, you may break the small parts inside – just what happened to me the first time:
Glue visible when pulling on the removable ear pad. イヤーパッドを剥がすと、ボンドが見えます。
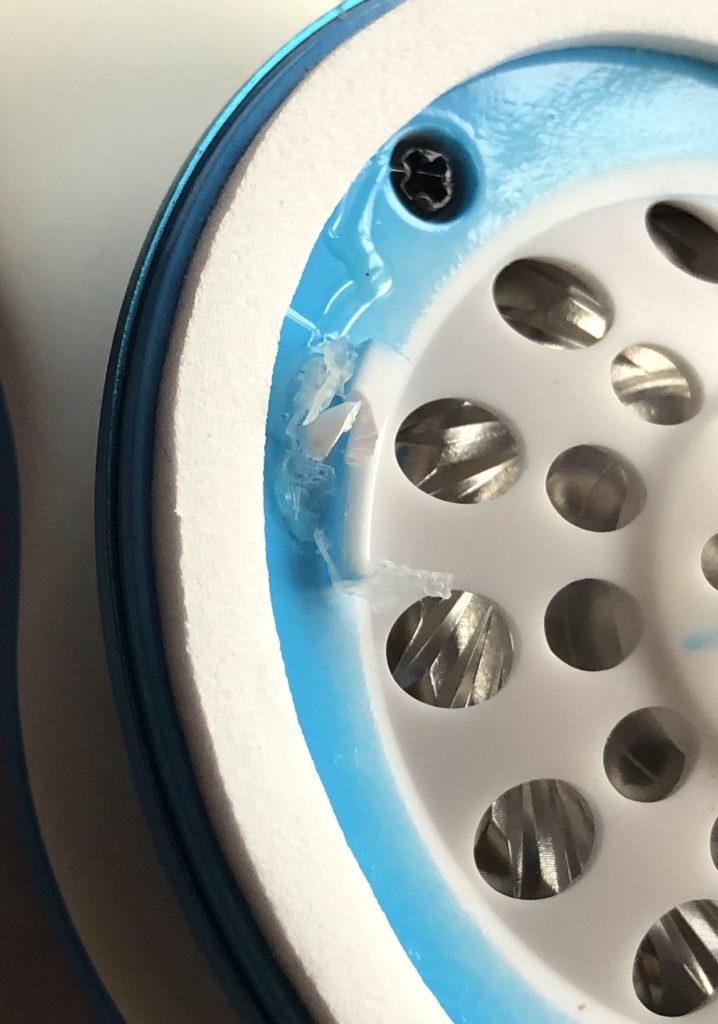
Pulling force may easily break the tiny hook structures that fix the pads. (Luckily only one of the three hooks broke in part…). 力を入れて剥がそうとすると、パッドを固定するためにフックのような構造になっているところが壊れます(私の場合、幸運にも、3つあるフックのうちの1つだけがほんの少し壊れました)。
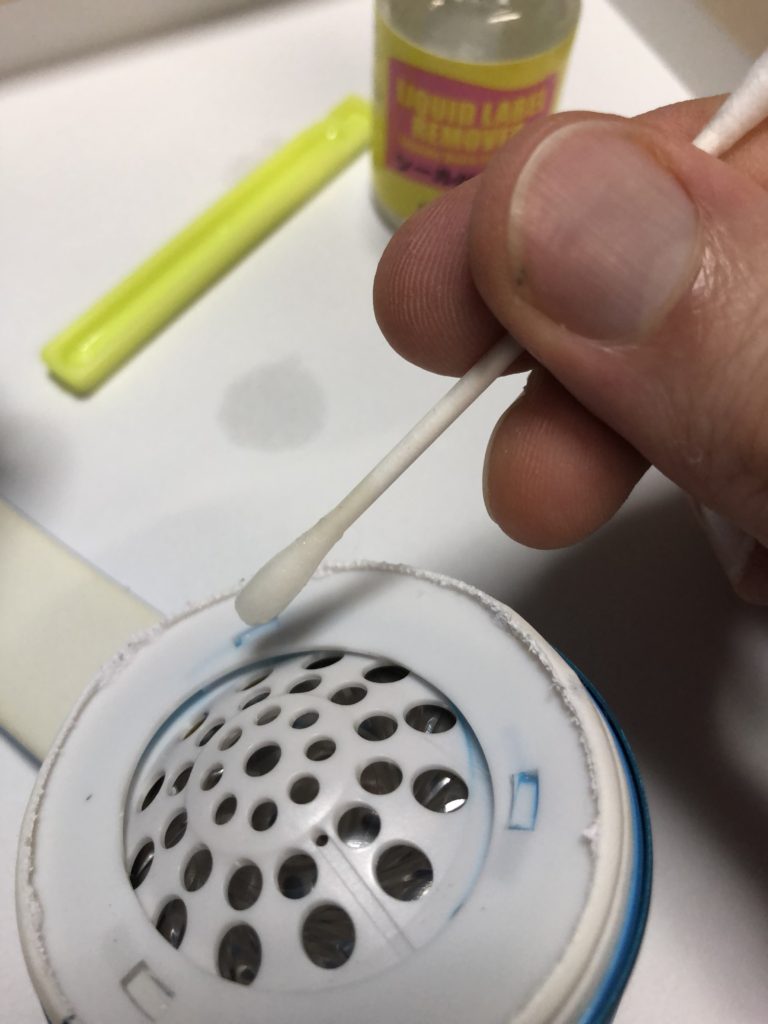
The recommended way is to prepare glue remover. Only a few drops are needed. You can find it in one-coin-shops, e.g. this one:
Glue remover / solvent is strongly recommended to avoid damaging the tiny plastic hooks. A few drops may be sufficient to loosen the glue and unlock the pad. Avoid spilling as this may damage the speaker. 小さなプラスチックのフック部分を壊さないためにも、シール剥がし液の利用をお勧めします。ボンドの部分を柔らかくしてパッドをうまく外すためには、数滴の剥がし液でOKです。剥がし液が多すぎて垂れ落ちてしまうと、スピーカー部分が壊れる原因となります。
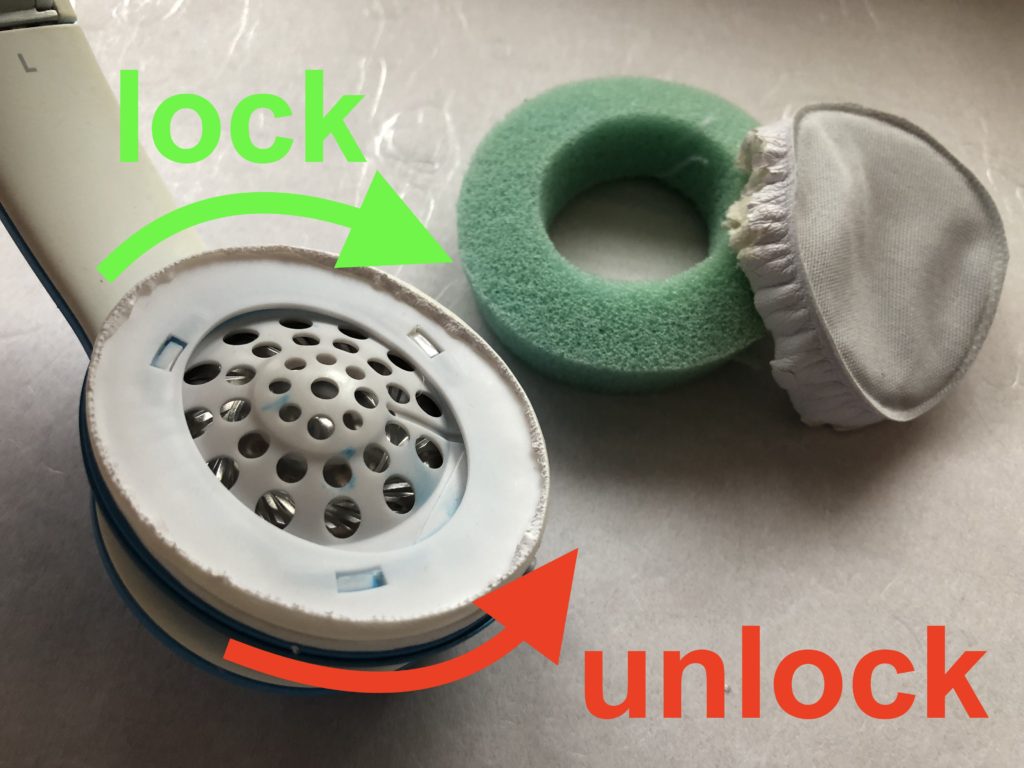
Also, let’s be aware of the correct direction to turn the pads to lock / unlock position:
イヤーパッドをロックする方向、外す方向を確認しましょう。
Let’s start:では取り付けを始めましょう
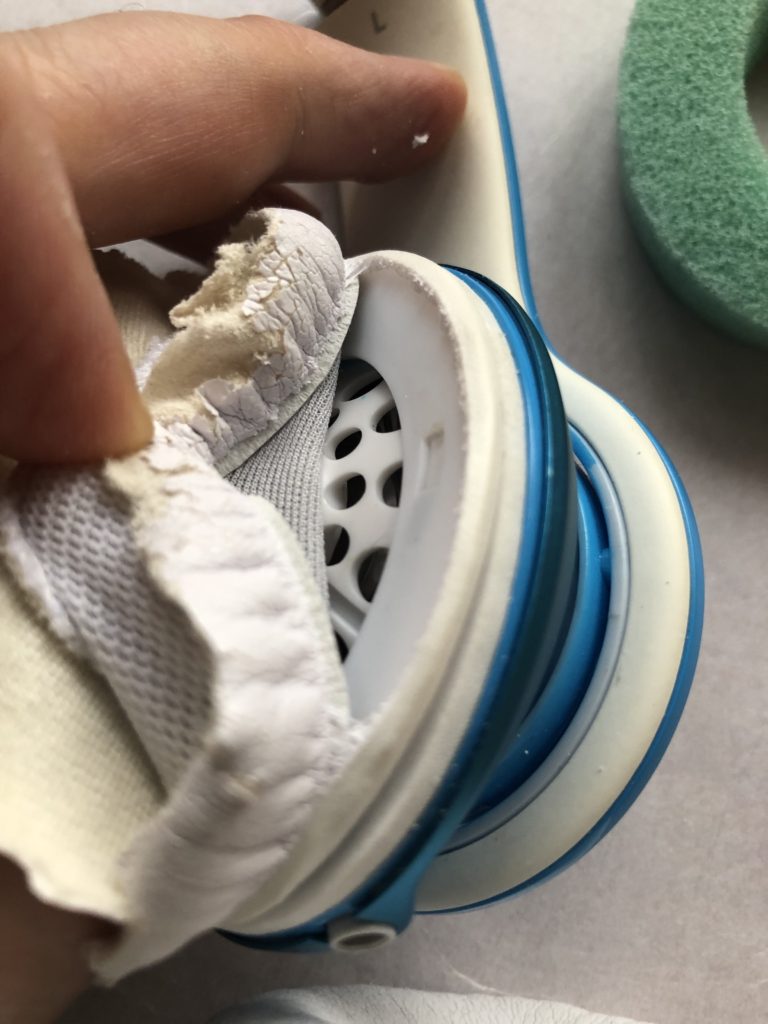
Remove the old pad. Most likely you may not be able to simply unlock and remove the exchangeable ear pad just by turning counter-clockwise.
I used a pair of scissors and then pulled (and tore) the old synthetic leather textile:
私の場合、ハサミでを使って白い合成皮革部分を引き破っていきました。
Carefully use a pair of scissors to cut the textile and make a hole. 注意深く合成皮革部分を切って穴を開けます。
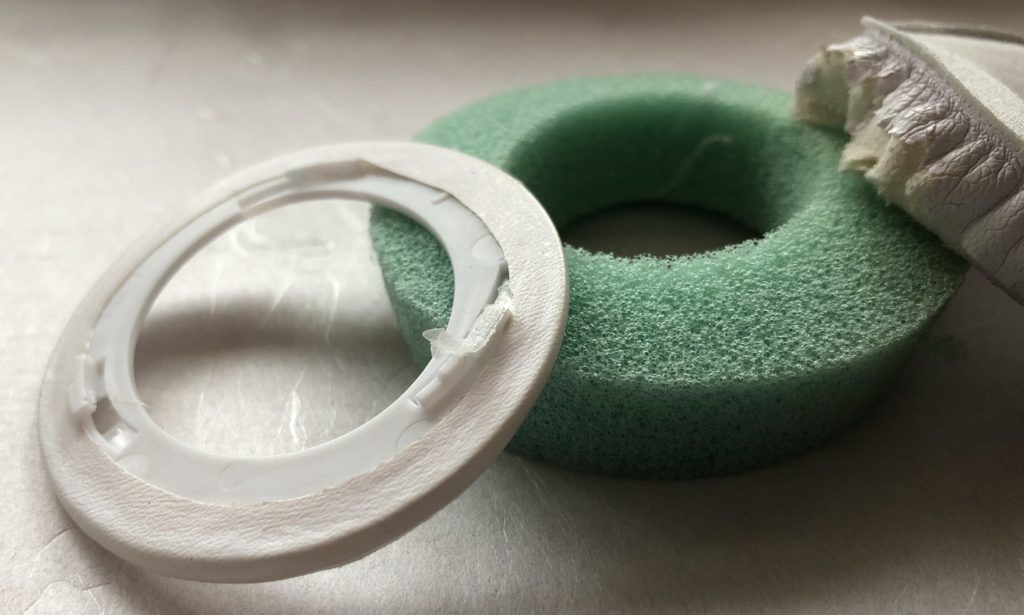
Cut around and remove the spongy foam inside. 合成皮革部分を切り開いて、内側のスポンジを取り出します。
Pulling the textile, it easily tore apart along the connective plastic piece (flat ring). 手で古いパッド部分を引っ張ると、プラスティック部分から破れるようにして簡単に外れました。
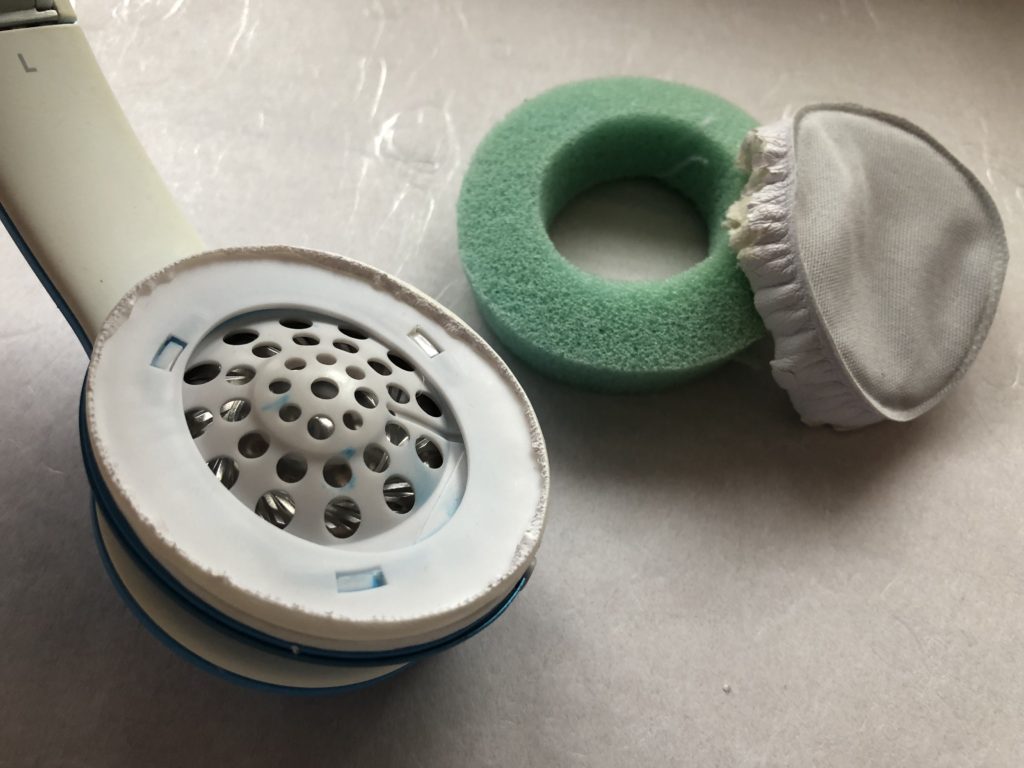
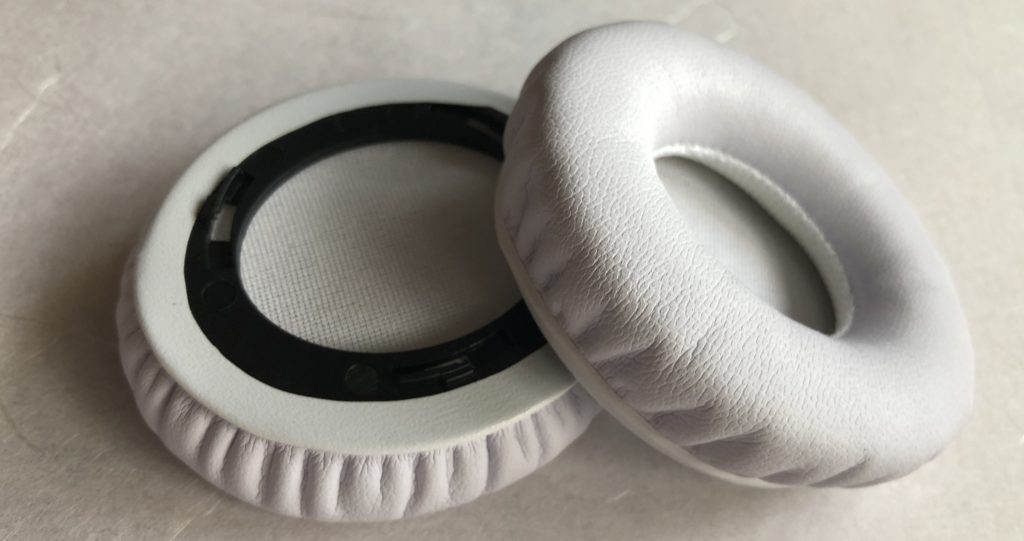
Headphone with connective flat ring still attached (locked) to the speaker. ヘッドフォンのスピーカー部分にパッドの平らでで丸いプラスチック部分がそのままくっついている状態です。Soak the cotton swab with glue remover, then release a drop portion into the glued lock system (3 locations). After one minute or so, try to move the flat plastic ring counter clockwise by firmly holding the speaker. If necessary, repeat this procedure. Avoid spilling of glue remover into the speaker to avoid damage. 綿棒をシール剥がし液で濡らして、フック部分の3箇所に一滴ぐらいずつ垂らしましょう。約1分間後、反時計回りに平らな白いプラスチック部分を動かします。その時には、スピーカーをしっかり固定して持ちましょう。必要に応じてこの手順を繰り返してください。シール剥がし液を垂らしすぎてスピーカーの中に液体が入らないように気をつけてください。I proceeded by putting on the new pads without removing the glue. (It might be worth removing the remaining glue resin… however it worked fine for me without.) 私の場合、平らな白いプラスチック部分を取り外してから、すぐに新しいイヤーパッドを取り付けることができました。(私は、残ったボンドを取り除く必要はありませんでしたが、状況に応じてきれいにしてください。)The old ear pad in parts after removal. 外した古いパッドの各パーツです。Now it’s time for the new ear pads to shine… さあ、新しいパッドをつけましょう。Hold the speaker firmly. Align the new ear pad so to lock in by a short clockwise movement. スピーカー部分をしっかり持ち、ロック部分を合わせて時計回りに少しまわしましょう。Push against the speaker, then turn clockwise to lock in the new pad. Best if you apply even pressure on all 3 hooks by placing 3 fingers on those locations on the pad. 新しいイヤーパッドをスピーカー部分にしっかり合わせて、時計回りにまわして固定します。フックがある3箇所をそれぞれ指で押さえて、等しい圧力をかけてください。Done! Congratulations. Please leave a message below if you like. これで完成です!うまくいきましたか?おめでとうございます!